Popular
Troubleshooting Guide
- 32 views
If there are difficulties operating the DD104 the best place to start resolving issues is to go to the alarm screen. The alarm screen is described in the Alarms, Fault Codes, & Digital Inputs Guide
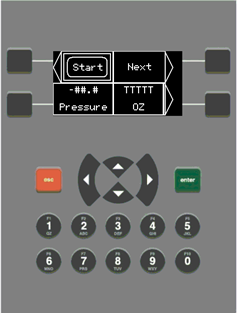
Press “0” Button To Access The Alarms Screen
Fault Codes and Corrective Actions
If there is a fault, it will display in the alarm screen. The system will automatically redirect to the alarm screen if a fault is active when the Start button is pressed. Below are all the machine faults, their cause, and paths to fault resolution.
NOTE: Many suggestions below will include checking a digital input (DI) status. Input and output screens and how to access them are described in the Alarms, Fault Codes, & Digital Inputs Guide.
- Not Pressurized
- Hopper pressure does not reach the pressure set point. Check set point, leaks in system, system pressure, dough present in hopper.
- Knife Ext Fault
- Knife did not reach the extended position. Check system air pressure, free movement of knife blade and DI6 for illimination. If knife is extended and DI6 not illuminated then check the cylinder proximity sensor.
- Knife Ret Fault
- Knife did not reach the retracted position. Check system air pressure, free movement of knife blade and DI 7 for illimination. If knife is retracted and DI7 not illuminated then check the cylinder proximity sensor.
- Block Ext Fault
- Block did not reach the extended position. Check system air pressure, free movement of dough block and DI 8 for illimination. If knife is extended and DI8 not illuminated then check the cylinder proximity sensor.
- Block Ret Fault
- Block did not reach the retracted position. Check system air pressure, free movement of dough block and DI 9 for illimination. If block is retracted and DI9 not illuminated then check the cylinder proximity sensor.
- E-Stop Pressed
- E-Stop button is pressed or safety relay has not reset. Light should be illuminated while button is pressed. Twist estop button to release the stop condition. Check DI3 for illumination, if off then the safety relay has not reset. Repress and then depress if fault did not reset.
- Setting faults
- If any of the setting faults are active, check the setpoints in the settings and ensure none are set to 0.
- Over Max Press
- Pressure inside the hopper has surpased the Max Pressure setpoint. Check that the setpoint is set correctly, pressure regulator is set correctly and functioning properly, ASME pressure relief valve is functioning, hopper connection pressure relief moves freely.
- System Idle
- System was left on without running a cycle for 30 minutes. Press button to start cycle to reset the condition.
- Press Drop
- System measured a sudden drop in pressure in cycle. Check to make sure no new leaks have occurred and that there is still sufficient dough to be processed.
- Over Min Press
- Pressure inside the hopper is too high to start cycle. Allow time for hopper to depressurize before starting again. Pressure needs be under 1.5psi when pressing the start button. This ensures pressure sensor is not misreading.
- No Pressure Build
- Pressure inside hopper did not read above 1.5 after 5 seconds. This indicates a more extreme version of the Not Pressurized fault. If there is no audible air leak, check system pressure.
- Knife Stuck Ext
- Knife is fully extended after retract movement was started. Check system air pressure, and free movement of knife blade. If pressure is above 60 PSI and knife can be moved by hand then air valve may need maintenance.
- Knife Stuck Ret
- Knife is fully retracted after extend movement was started. Check system air pressure, and free movement of knife blade. If pressure is above 60 PSI and knife can be moved by hand then air valve may need maintenance.
- Block Stuck Ext
- Block is fully extended after retract movement was started. Check system air pressure, and free movement of dough block. If pressure is above 60 PSI and knife can be moved by hand then air valve may need maintenance.
- Block Stuck Ret
- Block is fully retracted after extend movement was started. Check system air pressure, and free movement of dough block. If pressure is above 60 PSI and knife can be moved by hand then air valve may need maintenance.
- Count Complete
- Indicates that the system reached cycle count of the active recipe. System should be stopped with knife and block extended, hopper depressurized, and automatically changed to the next recipe. This fault can be disabled by changing the System Setting “Cycle Counting” to Disabled.
- Compressor Stalled
- System detected that the power draw was above the Compressor Stalled set point for too long. This indicates that the compressor is trying to run, but can not. This is most likely due to pressure on the compressor head. Open the front panel and turn the red level on the compressor’s pressure switch. This will turn off the compressor and relieve the pressure. After 10 seconds turn the compressor back on. Clear the fault and the compressor would start running again.
- Hopper Leak
- Hopper pressure reached set pressure, but the compressor continued to run for too long. This indicates that there is a leak in the system that could negatively impact machine performance. Open the lid and re-seat the gasket before restarting the cycle.
- Compressor Leak
- System detected too many compressor starts outside of cycle. Check the system for leaks then reset the fault.
- Excess Air Usage
- The system is using more air than expected to operate, this could negatively impact performance. Check system for leaks, recipe set points for blowout time, and reset the fault.
- Current Monitor Low
- Current monitor sensor is reading too low of a value, check wiring or replace unit as needed.
Operating Problems
Dough balls won’t eject fully
- Ensure correct dough recipe is being followed and dough temperature is with in the specified range (60-90F). To much water content or hot water will cause dough to be too sticky and may result in ejection issues
- Oiling the dough directly should be avoided, especially if split to assist in loading the hopper. If dough is oiled it prevents it from merging back together creating “seams”. These seams will cause issues during dough ball ejection as it gives a path for the air to escape instead of ejecting the dough ball.
- Verify all four Dough Block Plate fastener knobs are tightened down. If they are loose, the Dough Block won’t be sealed and the dough ball will have trouble ejecting
- Check the o-ring on the underside of the Dough Blow-Out Block. If the O-Ring is damaged, worn flat, or seated improperly, the Dough Block wont be sealed and the dough ball will have trouble ejecting
- Verify air supply fitting are tight and no air leaks from them during operation
- Ensure air compressor is on and suppling system with 90psi, if not see “Preventative maintenance” for further compressor troubleshooting